
0 Comments
Hot Foiled Shaker Cards- 3 Ways
Video Tutorial
Card One

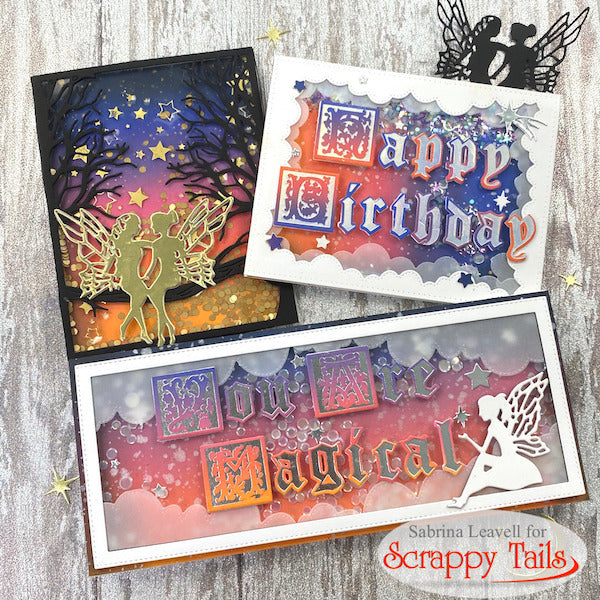
The backgrounds on all three of my cards were ink blended using the following 5 Distress Oxide ink colors: Carved Pumpkin, Abandoned Coral, Picked Raspberry, Blueprint Sketch and Black soot.
For my slimline card, I splattered some pearlescent watercolor to my ink blended panel to create some stars. I also scattered a few small silver die cut stars.
The white shaker frame was created with two stitched rectangle dies. Behind the frame, I added some vellum clouds to add more interest. Those were die cut from the cloud border in the "Slimline Everyday Borders II" die set.
Inside the shaker, I added some iridescent clear sequins. Outside the shaker, I glued my silver foiled sentiment that says "You Are Magical". Each letter was foiled using the "Uppercase" and "Lowercase Old English Font" hot foil plates by Scrappy Tails. The lowercase font has coordinating dies, which I used to cut them out. The uppercase font comes with two squares that you can use to cut each letter out. Each letter is backed with two additional heavy weight white letters for dimension.
Finally, I glued a white fairy silhouette to the bottom left of the card. She is also popped up with additional die cut layers.
Card Two

Out of the three cards I created, this one may be my favorite. I hot foiled the sentiment "Happy Birthday" using the same "Uppercase" and "Lowercase Old English Font" hot foil plates. This time, I foiled with a holographic rainbow foil, so pretty!
The shaker frame was created using the "A2 Cloud Cover Plate", which I cut from white card stock and vellum. I offset the vellum clouds behind the white ones to add more interest.

My shaker bits are a mixture of Miss Ink "Dazzle Stars" confetti and iridescent confetti. The stars are cool because depending on where the light hits them, they can look either purple or blue!
Finally, I embellished the outside of the shaker window with some more small die cut silver and purple stars.
Card Three

I changed things up with card three and went with gold elements instead of silver. I started by splattering some gold watercolor stars to my ink blended background.
Instead of using the foil letters for this card, I used the "Fairy Dust Swirl" hot foil plate. I used a matte gold foil and foiled onto some heat resistant acetate. My acetate slightly warped, but it worked well enough for me!

My shaker bits for this card are matte gold confetti by Sizzix.
I glued the foiled acetate to the back of a black "A2 Forest Cover plate" die cut. I love how the stars look like they're floating on the card!
Finally, I glued a silhouette die cut of two fairy friends sitting beside each other. They were die cut from gold mirror cardstock and backed with several layers of white die cuts to help pop them up.